

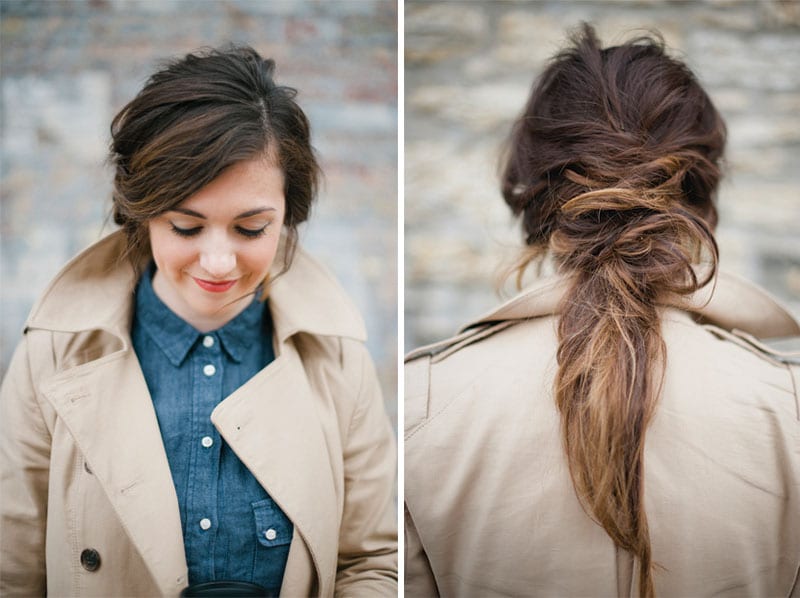

This is the first of a three-part series made in collaboration with Juut Salonspa. We’ll be talking hair, skincare and spring makeup during the month of April! First up: a new spring up do we’re calling “The Deconstructed Ponytail”
Achieving the perfectly tousled ponytail has long eluded me. It seems like a simple trick, but I’ve found many women have similar woes. Too high, too tight, not enough lift- the ponytail has never been a go-to look for me. Lastly, due to years of ponytail envy, I’ve wrongly dubbed the the look as not for me, or worse, kind of boring. I’m here today to say that I have been proven wrong.
When I shared my woes with Juut Salonspa, they suggested we do a ponytail makeover. Let me tell you- this totally changed my ponytail game. I walked away with great new-to-me tips that will hopefully come in handy for you too! We played with a few different styles and decided to share this tutorial for the “deconstructed” ponytail. It can be simplified based on the look you’re going for, and I promise, it looks more complicated than it actually is! Let’s break it down into 4 steps:
Do the pony


1.Add Volume.
Rub your fingers through the front part of your hair and let it fall into it’s natural part. In a zig-zag motion, select a small section of hair a few inches behind your natural part, near the very the top of your head. We want to avoid using a straight line here, as it helps keep the back comb volume. Sprinkle some Pure Abundance Hair Potion at the root of the hair and back comb the section no more than an inch from the base of your scalp. Spray with hair spray. Repeat this step 3-4 times with small sections of hair, moving down your scalp. Once you’re finished, lightly smooth the back combed sections with your finger or wide tooth comb.
2. Find the Perfect Placement.
There are two places a ponytail best flatters your face. Hold a comb along the your jaw line, just under your ear, to locate it. For a lower ponytail, angle the comb down along your eyebrow and ear line. We decided to add lift at the top of my hair and secure the ponytail at the nape of my neck. This tip blew my mind.
3. Secure Lift and ponytail base.
Once you decide where you want to place the ponytail, secure lift at the top of your head by combing/smoothing the top section of your hair back, leaving hair around your face. Twist this section once, and secure with a few bobby pins. This allows the back combed area of hair to be free from the weight of the ponytail. Follow this step by create a small ponytail at the nap of the neck, leaving hair around your ears and either side of your face.
4. Add Texture.
Separate the hair on either side of your face into two sections. You’ll make four loose braids in total, two on either side of your face. Start with the section closest to the nape of your neck on the opposite side of your part (if you have a side part). Once you’ve loosely braided the section of hair, sprinkle it with some hair potion and lightly slide your index finger and thumb up the braid. Release the braid and pull it apart slightly with your fingers. Take the loose braid, drap it slightly around the side of your head, and wrap the end around the small ponytail at the nape of your neck. Secure it underneath your ponytail with bobby pins. Continue this technique with the other sections of hair. Remember to keep it loose and let some of the ends stick out slightly. You could do up to loose six braids if you really want to amp up the volume, or two for a simpler look. The braids allow for the ponytail to look loose and messy without falling apart immediately.
Additional Tips:
It helps if you style with day-old hair. Your hair has more texture and the natural oils help for a more secure updo. If you loose lift through out the day, carefully stick your fingers into the back combed section of hair and lightly scrunch the area to reactivate the pure abundance hair potion. Add hairspray to this section if needed. If your ends start to get frizzy, twist them lightly in between your fingers. You can also simplify this process by creating two braids instead of four. I’ve recreated this look with only two braids in under 5 minutes and the look is still really great!


This experience changed the way I traditionally thought of “updo” appointments. You don’t have to reserve them for weddings or a special night out. Consider taking the opportunity to take some pictures to your stylist to learn new ways to style your hair for spring! What I love most about this relaxed look is it’s versatility. With a smoked eye, it easily transitions into a great date night look. It is also casual enough to wear running errands around town. Once I was all made up, we thought it would be fun to take the new ‘do out for a spin for post work errands and a happy hour cocktail.


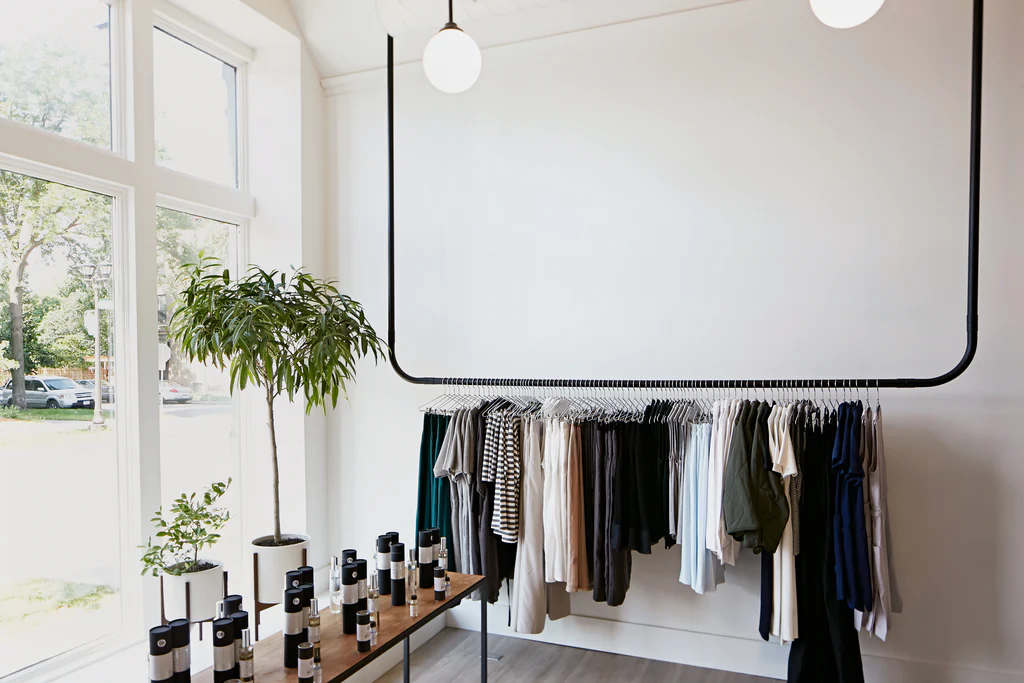
So Melissa, Ashley (the lovely Marketing Manager at Juut Salonspa) and myself headed over to the North Loop to stop by The Foundry Home Goods to see what was new, and grab a drink at Marvel Bar. I’ve come to love this growing neighborhood, and shops like The Foundry Home Goods, Arrow, and Askov Finlayson continue to make 2nd and 1st St my favorite shopping destination. We ran into Chris Drees , head of visuals at Askov Finlayson (pictured above), while snapping pictures, and I couldn’t help but take a picture with him in our head-to-toe denim outfits. Thanks to The Foundry Home Goods letting us stop by and shoot in your your gorgeous space. And to Peder for mixing me my favorite Marvel Bar libation, The Waldorf. It was a great way to end a fun afternoon.
If you have any questions about the updo, leave your comments below! I’d be happy to follow up with you. If you’re curious about the products and clothing featured, you can find the info below. Stay tuned for some spring skincare advice
Hair Products available at Juut Salonspa: Air Control (best hair spray ever), Pure Abundance Hair Potion, and hair elastics, bobby pins, back combing brush.
Clothing: chambray shirt available at Parc Boutique, jeans by Zara (alternatives at Parc Boutique), shoes by Manolo Blahnik (JCrew has a fantastic alternative), trench by Ann Taylor (similar one from A.P.C, and ASOS.com , and my can’t-live-without clutch by J.W Hulme.
Photography by Melissa Oholendt
Special thanks to Liz at Parc Boutique for pulling for us!
* This post was sponsored by Juut Salonspa


Kate is the founder of Wit & Delight. She is currently learning how to play tennis and is forever testing the boundaries of her creative muscle. Follow her on Instagram at @witanddelight_.
BY Kate Arends - April 1, 2013
Most-read posts:
Did you know W&D now has a resource library of Printable Art, Templates, Freebies, and more?
take me there
Get Our Best W&D Resources
for designing a life well-lived



Thank you for being here. For being open to enjoying life’s simple pleasures and looking inward to understand yourself, your neighbors, and your fellow humans! I’m looking forward to chatting with you.
Hi, I'm Kate. Welcome to my happy place.









The hair is absolutely stunning, but your lipstick is so lovely! May I ask what you’re wearing?
If only my hair were that long and thick! (jealous)
love this! so chic. i have short hair and this doesn’t make me want to grow it out, but i can appreciate a beautiful style! love the photos.
Love this look. That hair is so fab as are you.
XX-Myrna
mybeatboutique.blogspot.com
Gorge.
this is my absolute favorite hairstyle but it still looks confusing to me… how did they get your hair to look the way it does at the part of the pony that is just below the nape of the neck (and above the very end of your hair)? lots of randomly placed bobby pins? it is so perfectly messy! guess i’ll need to schedule my own updo appointment and take these pictures with me.
Chris Drees is awesome! I met him through my good friend Erin. He needs to visit us down in Omaha!
Loving this! And gotta try it. <3 I have the perfect length for it right now… and I really have no other idea on what to do with my hair sometimes!
so pretty! love it
So distracted by your NAILS! What a perfect color. Is it a gel?
This is PERFECT! I’m obsessed!
Love this! Thanks so much for the detailed instructions – very helpful.
They did a great job with your hair. I’ll try and use this. I’m still convinced the first time I do my messy look…is the best.
Corporate Catwalk
This is adorable, I like the way he fussed up the braids to incorporate them into the ponytail 🙂
What colour polish is this? I love it!
very cute!! i love this tutorial and the jeans look amazing on you!!
xo,aiyanajane
http://www.citystylecountrysmile.com
This is a beautiful post! The instructions for the pony tail are easy to follow and the photography is stunning. Great job.
What color polish are you wearing? It’s such a great orange red.
I love that nail polish! What’s the color?
So great, and love everything about the shoot!
That nail polish is beautiful! Can you share with us the brand & color? Thanks!
What’s the colour of your lipstick? Absolutely love it!
LOVE it!!!!!
This is the opposite of simple. The point of a ponytail is that you can do it about 60 seconds and go. I’m not sure this technically even qualifies as a ponytail–it’s some backcombing with multiple braids secured by a ton of bobby pins. Yup. That’s not a ponytail.
Oh no! this blogger doesn’t respond to her readers too bad!
looks great! love your nail polish! thanks for the tips on ponytails… can’t wait to try! jamie herzlinger
great post! love the hairstyle!
SO pretty. looks great on you! makes me not want to cut my hair this week so i can try it out…
Love the deconstructed ponytail & I can’t wait to try it!
I was wondering what kind/color the red nail polish you’re wearing is? It’s such a great red (which is tough to find). Thanks so much for the ideas & inspiration!
[…] Ponytail envy. […]
Love this look! Messy is hot 🙂
xo,
Jamie
http://inspirationlush.com/
[…] 14.) The deconstructed ponytail by Wit and Delight. […]
What color is your nail polish?
It is Revlon’s Colorstay in Delicious
[…] the perfectly tousled ponytail has long eluded me,” laments Kate of the Wit & Delight Blog. “It seems like a simple trick, but I’ve found many women have similar woes. Too high, too […]
lovely and sooo out of the box!!
[…] the perfectly tousled ponytail has long eluded me,” laments Kate of the Wit Delight Blog. “It seems like a simple trick, but I’ve found many women have similar woes. Too high, too […]
[…] believe it and think, yes! A new ‘do! And I’m always game to try it out. This time a “deconstructed ponytail” tutorial caught my eye. Here’s the […]
Well, I tried this out, and got stuck at the “take the loose braid, drape it slightly around the side of your head, and wrap the end around the small ponytail at the nape of your neck” part. The pictures don’t really show what they mean by “draping.” Ah well. Here’s my attempt: http://fullclutch.com/13705/deconstructed-ponytail/
[…] Master once and for all The Deconstructed Ponytail. My past attempts have left me looking like I’m trying out for the zombie cast of The Walking […]
just loved evrythng hair do, nail polish the jacket the jeans… waaww
Thank you!
So do you wrap the braids around the ponytail??
jlk.,
I’m having major hair envy right now. Love the volume and texture of this deconstructed ponytail. Gorgeous!!
[…] A messy ponytail. […]
Thank you so much, Amanda!
i really am in love with this hairstyle but i really am not able to follow these instructions can u do a tutorial on it or explain it once again with pictures step by step…please..
Howdy are using WordPress for your site platform?
I’m new to the blog world but I’m trying to get started and create my own. Do you need
any html coding knowledge to make your own blog? Any help would be really appreciated!
[…] tutorial […]
[…] witanddelight.com […]
[…] Get the detailed tutorial from Wit & Delight! […]
[…] I want to try this with my hair, but I have a feeling it will just fail. I can’t do […]